Many schools are beginning to use OneDrive in place of StorSimple, which you might remember as a named or lettered drive in your File Explorer (e.g. \\U:Home, \\Z:Home, \\psdfiles\TIM, or Z:\TIMStaff).
The easiest way to remember when to use each app is like this:
- Staff and Student Personal Files - PSD OneDrive
- Shared Department and School Files - SharePoint Site
This change offers a greater ability to store, access, collaborate, and share content from any device. This guide will walk you through how to migrate your content from the old school server to your personal PSD OneDrive.
Getting Started
Always start by going through your files and seeing what you might not need. Deleting and cleaning up your files makes transferring go faster!
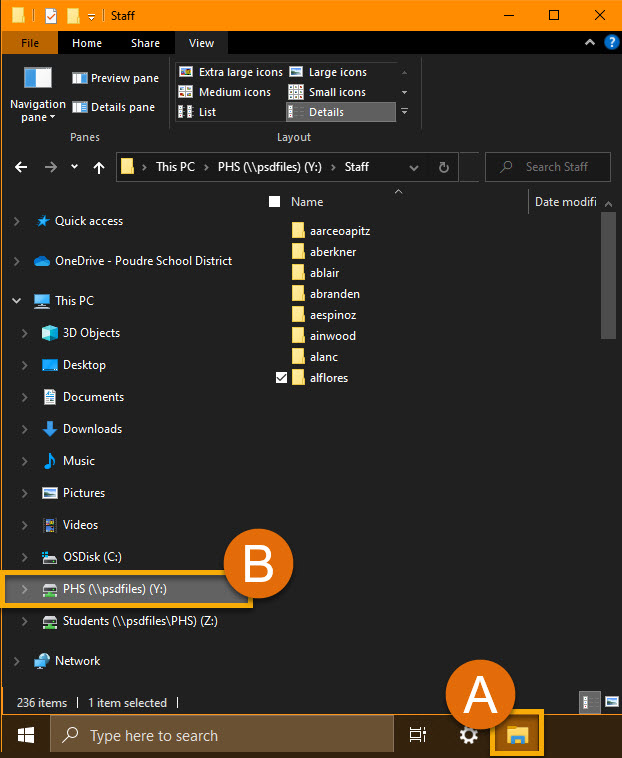
1. Open the File Explorer on your Computer (A) and navigate to the main server folder you wish to transfer over (B).

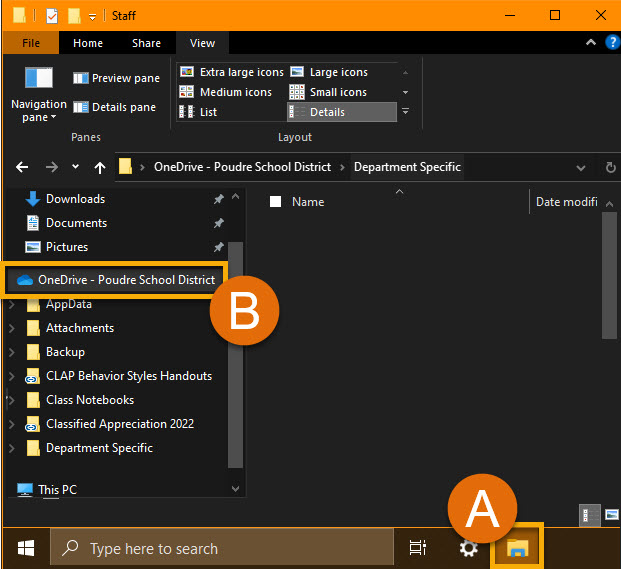
2. In a separate File Explorer window (A), open the OneDrive location where you wish to transfer the content (B).

Tip: Did you know you can dock two applications side by side? Check out the guide here.
3. Click and drag or copy/paste your content from the Server location over to the OneDrive location where you want to move it.

Tip: Have a lot of content to move? Open OneDrive in your browser, then drag and drop where you want it to live. You're less likely to have errors about not having enough space!
Note: Never "cut/paste" when transferring important content! If something goes wrong, you might lose your content for good...
4. You're All Set! You may need to wait depending on the size of content you are transferring over before you can access the content on your OneDrive.

