Getting Started in Teams
MS Teams
- Share ideas and expertise in private, chat-based conversations
- Create and collaborate using online documents
- Leverage automatic processes for daily activities and project tasks
- Integrates with Office 365 (calendar, chat, OneNote, etc.)
Contents (jump to category)
- Accessing Teams
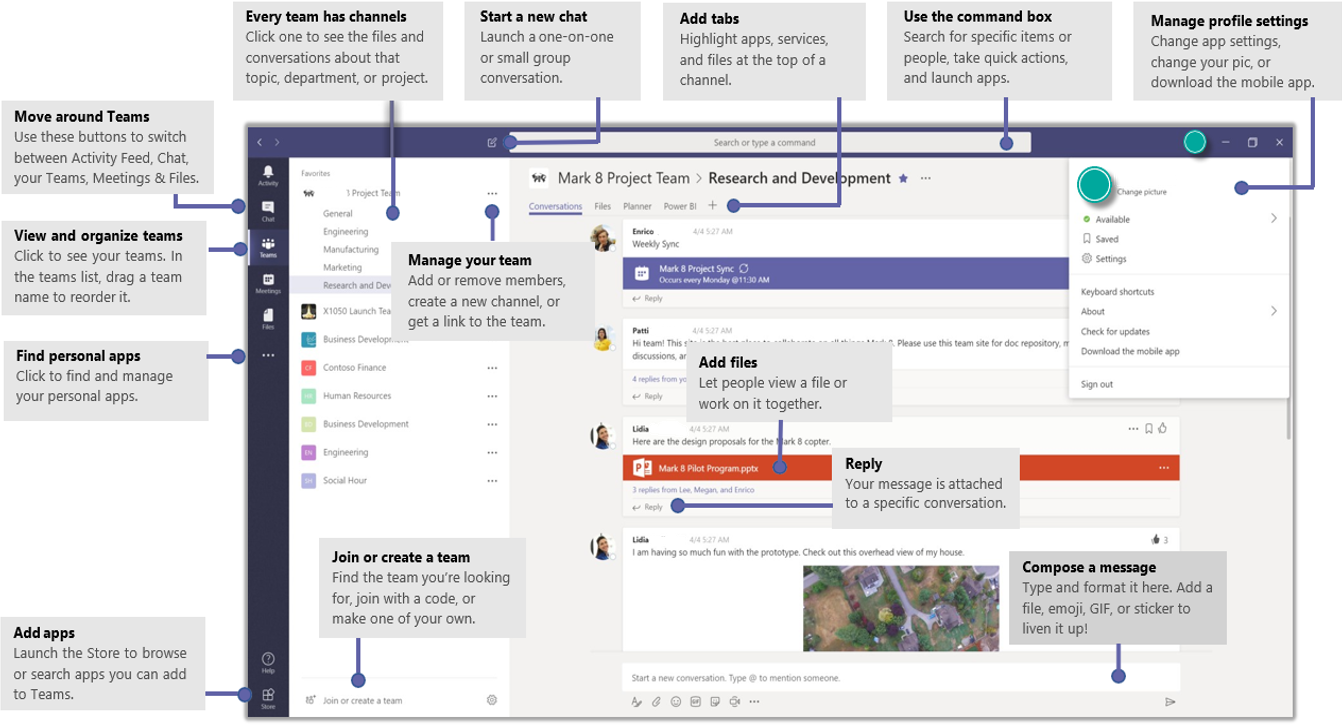
- Teams Quick Navigation
- Creating a Team
- Creating a Channel
- Team & Channel Management
- Start a Conversation
- Start a Meeting
- Stay on top of what’s happening
- Share a file
- Search
- Using Planner to create To-Do Lists / Tasks for Projects
There are multiple ways to access Teams:
- In Windows, click Start > Start typing in ‘Teams’ and open (Teams is already installed)
- On Mac, go to the Applications folder and click Microsoft Teams.
- In any browser, visit https://teams.microsoft.com
- Teams is also available as an app on mobile devices.
Sign in with your PSD email credentials.
Teams Quick Navigation
Creating a Team
A team is a collection of people, conversations, files, and tools—all in one place.
When starting your Team:
- Consider your name as it will affect your:
- Sharepoint site
- Outlook email address
- Have more than one owner to help manage memberships
- Talk Business Rules for organization
- How to handle files
- Use @mentions?
- Notifications setups
- Conversation Rules
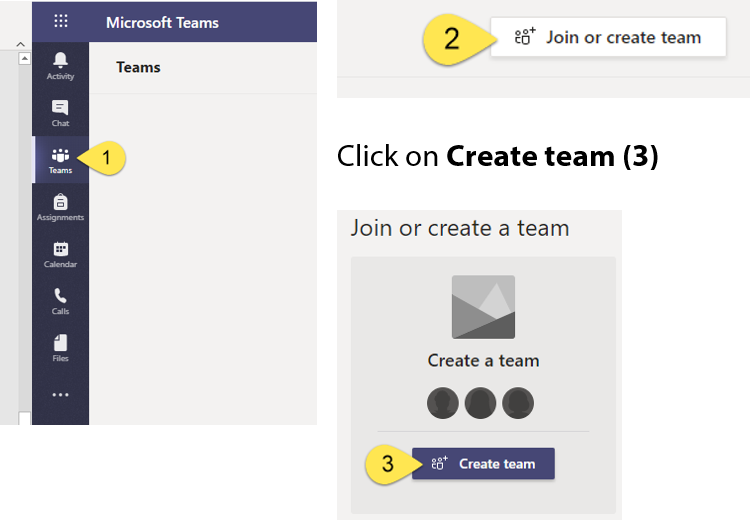
Once you have signed in to Teams, Select the Teams (1) icon on the left navigation. Select Join or create team(2) in upper right corner.
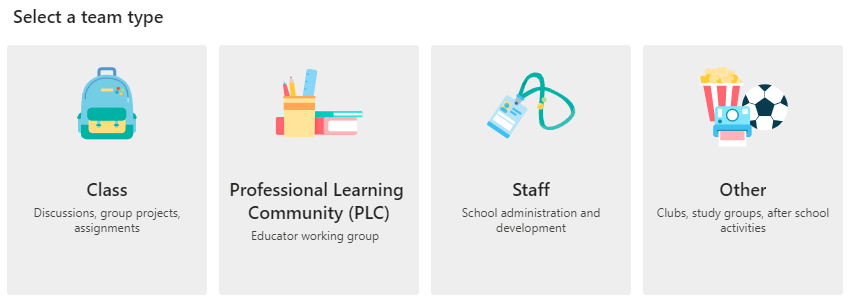
Select a team type:
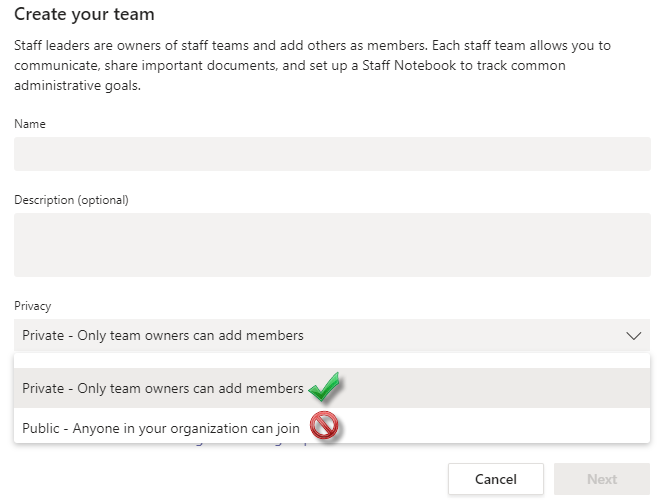
Enter Name and Description of Team. Keep Private as your option for Privacy. Click Next, you can start adding members to your team or Skip to finish to go to your Team page.
A channel is a discussion in a team, dedicated to a department, project, or topic.
Create focus by Creating Channels:
- Use General Channel for purpose, high level communication
- Create Channels to separate conversations or collaborative projects
- Be descriptive in naming of channels, projects, etc.
- Hide channels that are not in use or are not frequently used
- Email directly to a channel form Outlook
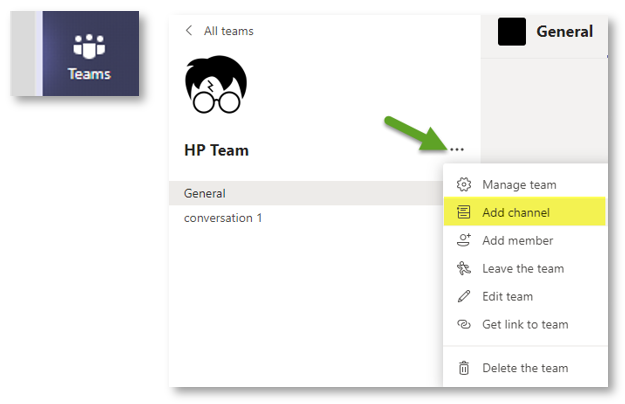
To create a channel, browse to your Team by selecting the Teams icon on the left and opening your Team. Browse to the three dots … to the right of your team name, select Add channel:
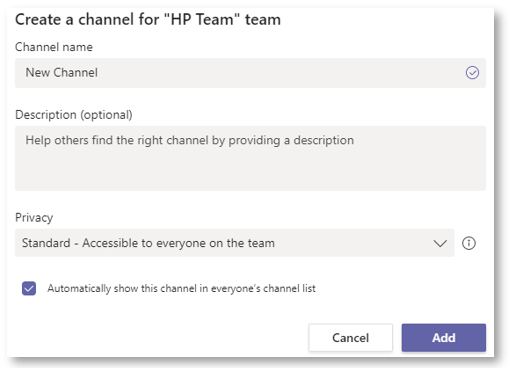
Complete the Channel Name, Description, and adjust privacy as needed. Click Add to complete adding the channel.
To make changes browse to your Team or a Channel. Browse to the three dots … to the right of your team or channel name.
|
Options are as follows for Teams: |
Options are as follows for Channels: |
|
Hide Manage team (pending requests, channels, settings, Analytics, Apps) Add Channel Add member Leave the team Edit team (Change privacy and photo) Get link to team Delete the team |
Channel notifications Hide Manage channel (moderation, who can start a post) Get email address Get link to channel Edit this channel (change name) Connectors (configure apps linked to channel) Delete this channel |
- With the whole team... Click Team, pick a team and channel, write your message, and click Send.
- With a person or group... (in lieu of Skype) Click New Chat (top), type the name of the person or group in the To field, write your message, and click Send.
- To add a Title (use for easier searching) or add formatting options, click on the format button.

Click Meet now under the area where you type a message to start a meeting in a channel. (If you click Reply, then Meet now the meeting is based on that conversation.) Enter a subject for the meeting, then start inviting people.
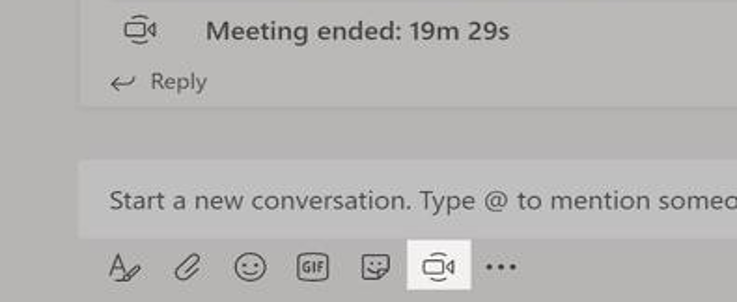
You may need to call x3456 if admin access is needed to allow microphone/camera
Stay on top of what’s happening
Click Activity on the left. The Feed shows you all your notifications and everything that's happened lately in the channels you follow.
Click Attach under the box where you type messages, select the file location and then the file you want. Depending on the location of the file, you’ll get options for uploading a copy, sharing a link, or other ways to share.
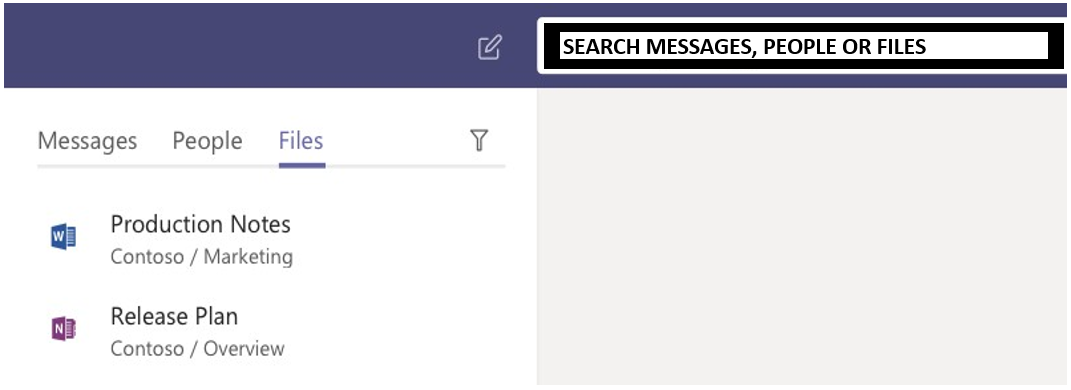
Type a phrase in the command box at the top of the app and press Enter. Then select the Messages, People, or Files tab. Select an item or click Filter to refine your search results.
Using Planner to create To-Do Lists / Tasks for Projects
Browse to your channel that you would like to create your project. Click on + to add a new tab.

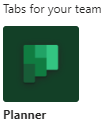
Browse or search ‘Planner’, select Planner. You can create a new plan or add an existing plan as desired.
Name your plan and save.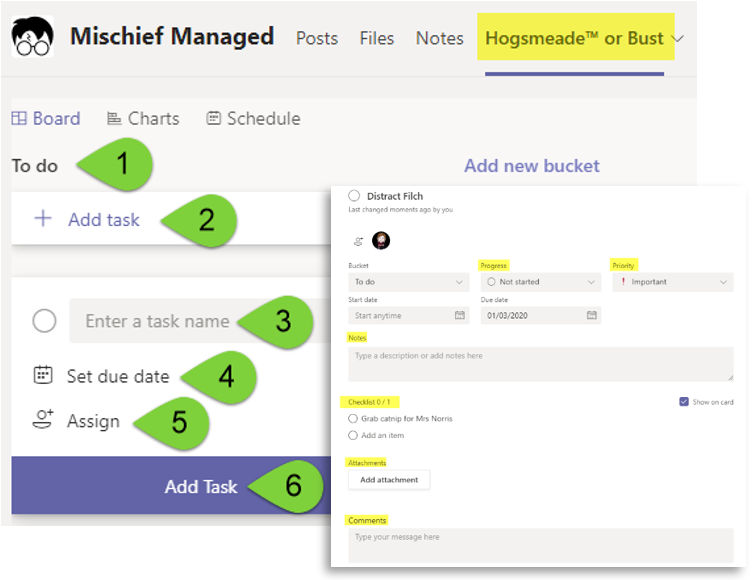
You will now see your plan or project in your channel tabs.
- Click on To do –change name of task title (referred to as bucket)
- Click on +Add a task
- Enter the Task Name
- Set a due date
- Assign member(s) to task
- Add Task
To set priority, set progress, add notes, checklists, attachments or comments, click on the task once it is created.

