

Taking a screenshot is a fantastic way to quickly get people on board with an idea or explanation of what you are seeing on your screen. This could include Support Techs looking to troubleshoot a problem, creating content for tutorials in the classroom, or even cataloging a process for yourself.
Take a look below at the 3 main ways to take a screenshot:
- Print Screen Button: Makes a copy of your screen that you can then paste into any program. Most users paste this image into Microsoft Paint.
- Windows Key + Print Screen Button: Automatically saves a picture of your desktop in the "Pictures> Screenshot" folder on your computer.
- Snip and Sketch Tool: Want more control over your screenshot? Use the Snip and Sketch tool built into Windows to change the capture size, set a timer, and automatically edit the image right after taking it!
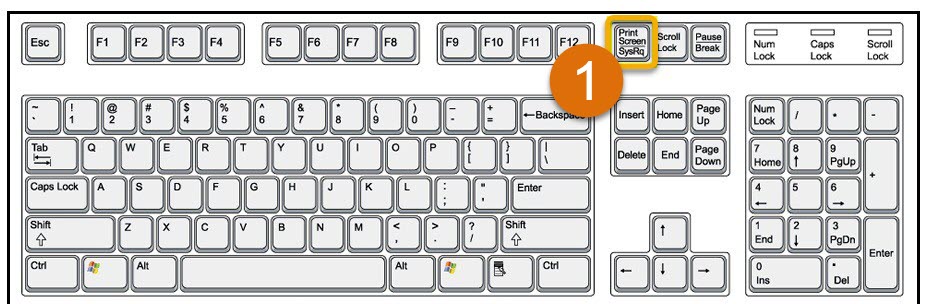
Print Screen Button
1. Locate the "prt scn" button on your keyboard. It is typically found above the Arrow Keys, across from the Function Keys (F1,F2, etc.)
2. You now have a copy of your screen in your clipboard.
Note: If you have multiple screens, pressing the "Prt Scn" will copy all of your active screens.
3. Open the Microsoft Paint application on your Computer.
4. Either go to "Edit> Paste" or hit Ctrl+V on your keyboard to paste the image into paint.
5. Save the file where you would like it to live.
6. You're all set! You can now Take Screenshots with the Print Screen method.
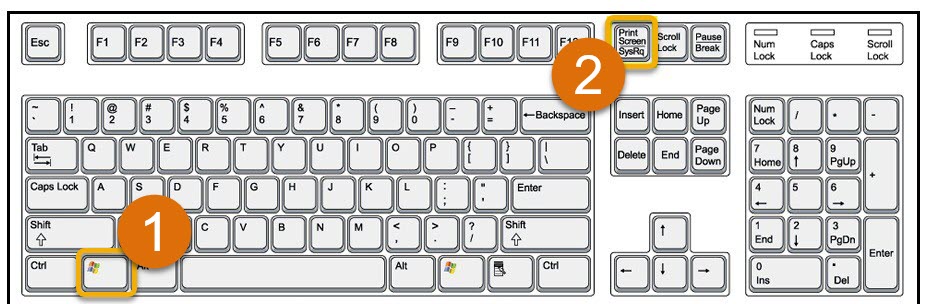
Windows Key + Print Screen Button
1. Locate the Windows Key ![]() and "prt scrn" buttons on your keyboard and press them at the same time. The screen will briefly turn grey, letting you know the screenshot was successful.
and "prt scrn" buttons on your keyboard and press them at the same time. The screen will briefly turn grey, letting you know the screenshot was successful.
Tip: If you would prefer, you can also hold down the Windows Key before pressing the "prt scn" button. Some users find this easier!
2. Navigate to the "Pictures" folder on your Computer (A), then the "Screenshots" folder (B). Here you will find your Screenshot saved automatically.

3. You're all set! You can now Take Screenshots with the Windows Key + Print Screen method.
Snip and Sketch Tool
1. Go to the Start Menu, Search for "Snip and Sketch", then open it.
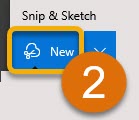
2. To start a new Snip, click the "New" button in the upper-left.
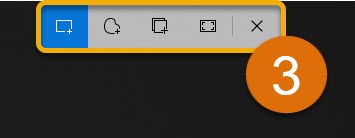
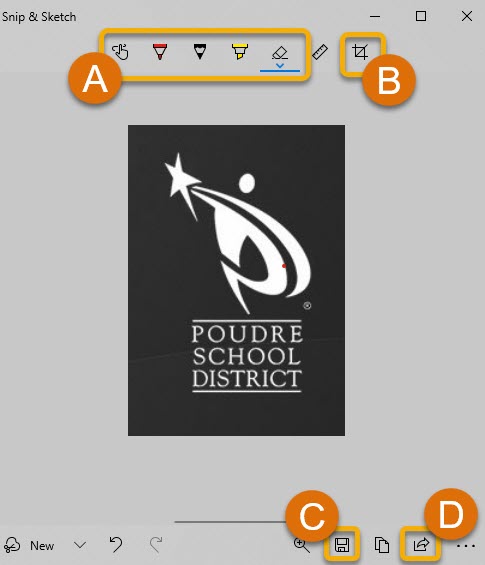
3. You can now use the toolbar in the top-center to make a custom snip. This includes (from left to right):
- Rectangle tool
- Freeform tool
- Multi-select tool
- Full-screen tool
4. Once you make your selection with the tool of your choice, it will automatically open the Editor. Here you can Draw on the Screenshot (A), Crop (B), Save (C), and Share(D).
5. You're all set! You now know how to use Snip and Sketch to Take a Screenshot.
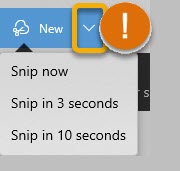
Tip: Want to start a screenshot after a delay? Click on the down arrow next to the New button, select the Delay Amount, then go!
Still have questions? Reach out to your School for more help and troubleshooting.