Checking Your Camera and Microphone
A working Microphone and Web Camera are important for any Remote Learning situation. This guide will show you how to check them both using two methods: Microsoft Silverlight and the Camera App.
Using Microsoft Silverlight:
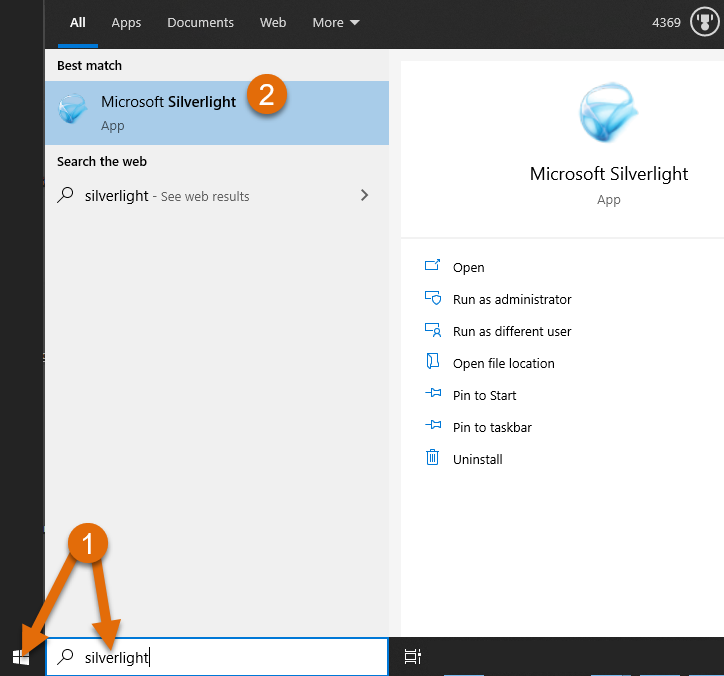
- Click the Start Menu in the bottom-left corner and type in “silverlight”.
- Select “Microsoft Silverlight” from the search results.
- Click on the “Webcam / Mic” tab.
- Make sure you can see your video in the left and the green bar for the Mic moves up and down as you speak.
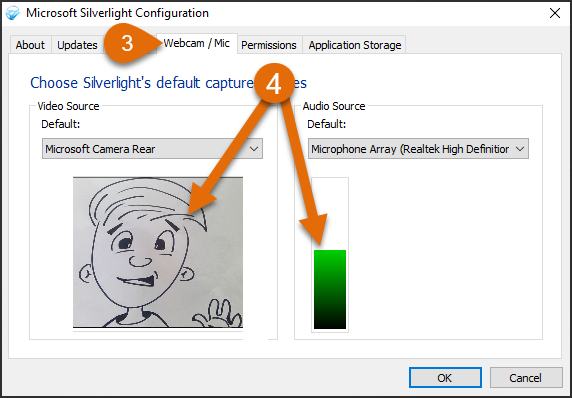
- If either your Camera or Microphone is not working correctly, make sure nothing is covered and you have the correct device selected from the dropdown. Still having an issue? Reach out to your school for further troubleshooting.
Using the Camera App:
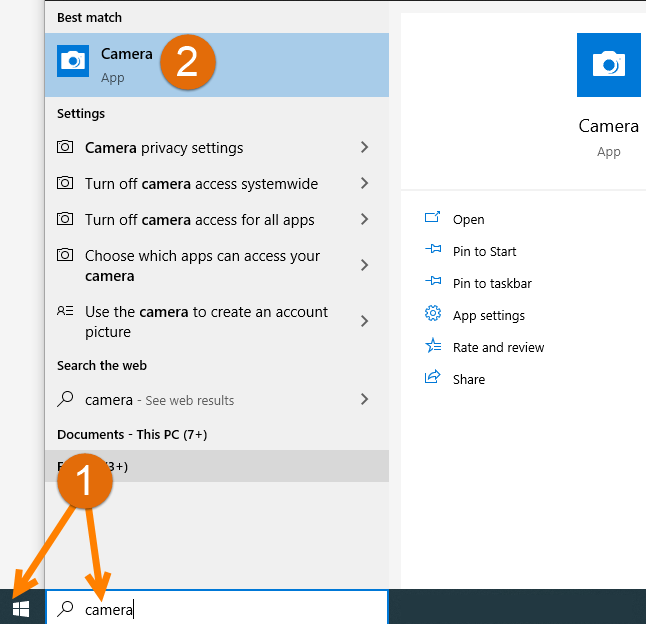
- Click the Start Menu in the bottom-left corner and type in “camera”.
- Select the “Camera” app from the search results.
- You should immediately be able to see yourself from your camera. To record a video, first, click the Take Video button on the right side menu.
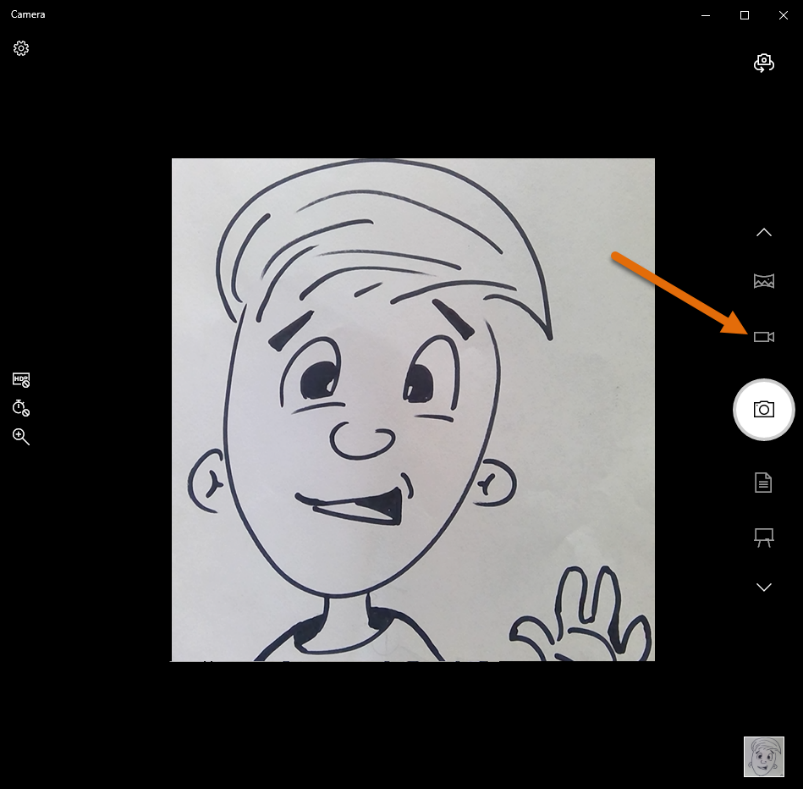
- To start the recording, click the Take Video button again.
- Make sure to say something to test the mic.
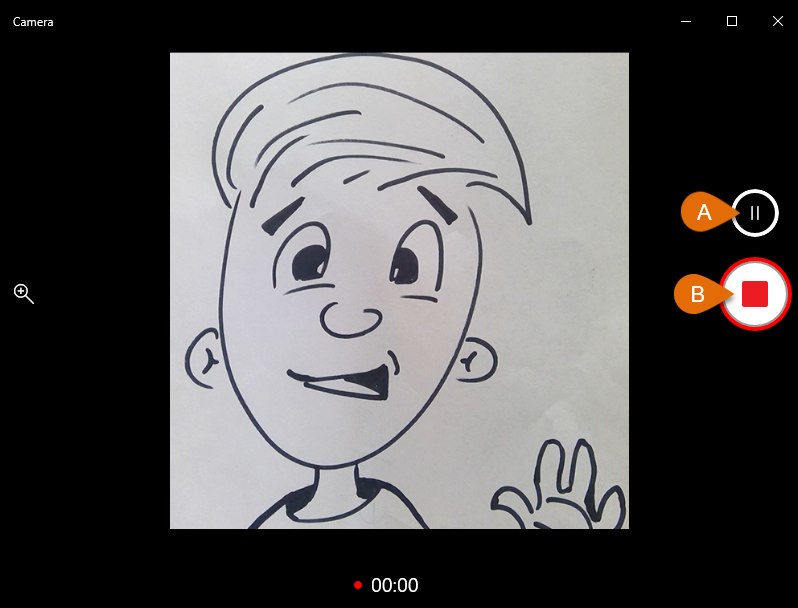
- You can Pause the recording by pushing the “Pause” button (A) or stop the recording by pushing the “Stop” button (B).
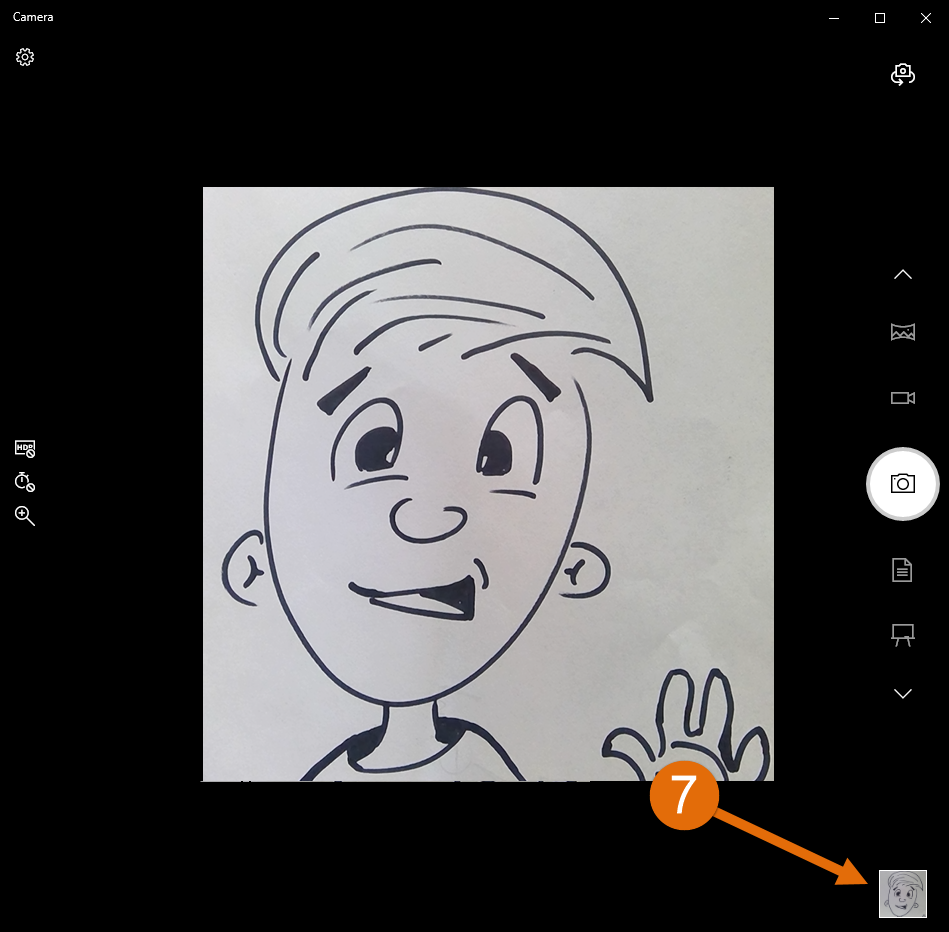
- Click the thumbnail in the bottom right to go to the clip you just made.
- Make sure your speakers aren’t muted and play the recording. If you cannot hear or see correctly, you may have an issue with your microphone or web camera.
Still Experiencing Issues? There might be something else happening, so please reach out to your school for further help and troubleshooting!

